Sponsored links

Lords Mobile: Battle of the Empires
All trademarks belong to their respective owners
Sponsored links
Related Games

Sponsored links
Latest Articles
-
![img]() Autumn's Transformative Journey: Evolving Pokémon in the Har...
Autumn imbues the Pokémon world with fresh discoveries and unexpected evolutions, inviting players to immerse themselves in a season of vibrant change. The Harvest Festival event breathes new life into the game, showcasing themed Pokémon and unique evolutionary paths that challenge trainers to think strategically. This period is highlighted by inventive tasks and a sense of playful urgency. With intriguing evolutions and specialized items to collect, the gameplay expands beyond simple catching into a pursuit of rewards tied to the season. The following sections delve into the evolving dynamics of gameplay, detailed mechanics for evolution, the aesthetics of seasonal design, and the multifaceted strategies that players can adopt to master these captivating challenges.
Celebrating Autumn Adventures in Pokémon Go
The seasonal transformation brings a festive energy that redefines the Pokémon Go experience. As the crisp air of fall arrives, players are greeted by a surge of themed Pokémon, each carrying the spirit of the season. The The annual Harvest Festival is set to take place starting October 10 and continuing until… 16, brings with it the promise of both familiar and novel challenges. Not only do the game’s overall ambiance and visuals change to reflect autumn’s hues, but the event also introduces special evolutions like Dipplin and its evolved form, Hydrapple. The game’s interactive elements become charged with the excitement of a seasonal celebration. Trails along the community paths now lead to specialized PokeStops where essential items are hidden, linking the festive atmosphere to tangible rewards in gameplay.
Uncovering New Evolutionary Paths
In this season of change, evolution takes on a new dimension as players explore alternative developmental paths for their Pokémon. Dipplin emerges as a captivating alternate evolution of Applin, originally hinted at in previous adventures. This evolution is not solely about upgrading a Pokémon but about engaging in a quest that requires resourcefulness and persistence. Trainers must manage scarce resources while working towards transforming their Applin into Dipplin. The game’s mechanics are designed to compel players to engage with events on a deeper level, mixing strategy with a touch of luck. Unique items, such as Syrupy Apples, become the cornerstone of this evolutionary process, reinforcing the idea that every interaction in Pokémon Go during this event can lead to rewarding and unexpected transformations.
Syrupy Apple Collection and PokéStop Journeys
The quest for Syrupy Apples stands as a testament to factional challenge during the Harvest Festival event. These special items are not scattered arbitrarily; they are strategically placed at designated PokeStops to encourage exploration and community engagement. As trainers wander through new and familiar neighborhoods, they must hunt for these apples with determined persistence. The process requires attentiveness, as each PokeStop may offer the opportunity to collect this crucial ingredient. However, collecting Syrupy Apples is not without its challenges, as random encounters with wild Pokémon can occur during the process, adding an unexpected twist to the collection journey. This intertwining of exploration and strategy transforms the simple act of item collection into a rewarding experience that deepens the immersive qualities of Pokémon Go.
Candy Accumulation and Evolutionary Demands
Collecting candy is a familiar yet essential task in the Pokémon world, now intertwined with the unique demand of evolving Dipplin. Players must amass a significant 200 Applin Candy to trigger the initial evolution into Dipplin, a testament to the game’s layered progression system. This accumulation requires consistent engagement and tactical planning, prompting trainers to participate actively in catching events and utilizing bonus mechanisms like Pinap Berries to maximize candy gains. Striking the right balance between effort and reward becomes essential as trainers navigate the demands of limited-time events and evolving gameplay mechanics. The resource management aspect in Pokémon Go reinforces the message that each catch and every move has a direct impact on a trainer's evolutionary journey, blending strategy with the familiar thrill of discovery.
The Challenge of Evolving Dipplin into Hydrapple
In the pursuit of new heights, evolving Dipplin into Hydrapple introduces an additional layer of strategic challenge. Unlike the initial evolution, transforming Dipplin requires an even greater commitment: accumulating 400 Applin Candy. However, the challenge does not end with gathering candy alone. Trainers are tasked with the unusual mission of catching seven dragon-type Pokémon while having Dipplin set as their buddy. This requirement to engage with a specific subset of Pokémon introduces an intricate twist to the evolution process. It compels trainers to tailor their catching strategies, weighing the benefits of continued candy collection against the need to focus on dragon-type encounters. This multi-step evolution is emblematic of Pokémon Go's effort to evolve game mechanics that demand both dedication and diversified gameplay strategies.
Diverse Tactics for Candy Gathering
Navigating the world of candy collection is a nuanced endeavor that underscores the strategic depth of Pokémon Go. Players are encouraged to employ a variety of techniques to efficiently gather the necessary resources for evolving their Pokémon. Utilizing Pinap Berries during catches emerges as a favored tactic, effectively doubling the candy reward and directly impacting the progress toward evolution. Beyond this, Transforming Rare Candy into the exact candy necessary for Applin development offers an alternative when standard means seem too slow. The event's surge in Applin appearances during the Harvest Festival further fuels the potential for rapid candy gathering. This interplay of tactics and in-game feature exploitation reflects a game design that rewards both perseverance and smart resource management, turning every encounter in the wild into an opportunity to inch closer to transformative evolution.
Gameplay Dynamics and Buddy Encounters
The evolving experience of Pokémon Go during seasonal events is deeply enriched by the integration of buddy mechanics and specialized encounters. When trainers set Dipplin as their buddy, their journey takes on a layered complexity, especially given the additional requirement to capture dragon-type Pokémon before reaching Hydrapple evolution. This feature encourages a more dynamic gameplay style where players must balance the routine of daily catches with the challenge of targeting specific Pokémon types. The buddy system not only serves as a pathway for evolution but also creates moments of serendipity and enhanced teamwork between the trainer and their Pokémon. These encounters foster a sense of companionship and trust, proving that success in Pokémon Go is as much about understanding and collaboration as it is about strategic resource allocation.
Visual and Tonal Aesthetics of the Festival
The visual transformation during the Harvest Festival event encapsulates the beauty of seasonal change in a richly immersive environment. The game’s interface subtly shifts to reflect autumnal hues, with warm tones and creative autumn-themed decorations enhancing the overall ambiance. This period is marked by a careful blend of functionality and artistry, where the design of PokeStops and in-game items like Syrupy Apples visually communicates the spirit of fall. The visual Indicators not only enhance the visual appeal but also fulfill additional functions practical hints to players about potential rewards and game mechanics. The stunning art direction instills a sense of wonder and encourages players to explore every corner, making each discovery feel significantly rewarding. The harmonious integration of art, gameplay, and seasonal narrative transforms Pokémon Go into a canvas that celebrates nature's transition.
Event-Driven Discoveries and Interactive Quests
The Harvest Festival event opens doors to interactive quests that expand the narrative beyond standard gameplay. Engaging with this event requires players to look for specialized items that drive their progress toward new evolutions. The collection of Syrupy Apples and the management of Applin Candy transform daily catches into pivotal moments of strategy and exploration. Gamers are encouraged to dive headfirst into a series of mini-adventures that challenge them to balance resource management with situational decision-making. These quests are designed to be both straightforward and layered in complexity, ensuring that veteran players and newcomers alike find the experience engaging. The goals are intricately intertwined with the event’s celebratory atmosphere, prompting trainers to explore the game world more intently and uncover hidden opportunities that only materialize during this unique seasonal window.
Seasonal Adaptations and Evolving Environments
The game’s commitment to dynamic, season-specific content ensures that each event is a unique narrative experience. As Pokémon Go evolves with seasonal themes, trails previously seen as routine become the backdrop for extraordinary tales of transformation and progress. Trainers adapt to environments where traditional gameplay meets innovative event-specific mechanics. Harvest Festival is a prime example where traditional tasks, such as collecting candy and items, align with broader event goals while requiring specialized strategies to secure evolutionary milestones like Dipplin and Hydrapple. This adaptive design encourages players to explore different facets of gameplay, reshaping their typical approaches and enhancing their engagement with the game world. The evolving event environment "serves as undeniable proof of the game developers’ creativity and hard work"’ commitment to continuously refreshing the experience for a dedicated global community.
Interactive Mechanics and In-Game Milestones
A significant aspect of Pokémon Go during special events is the interplay between interactive mechanics and personal achievement milestones. With the introduction of unique items like Syrupy Apples and the goal of evolving Applin, players are entrusted with balancing immediate rewards against long-term objectives. Each collected apple and every candy unit contributes to a larger narrative of progression, where measured efforts culminate in obtaining rare and coveted evolutions. The structure of achieving a Hydrapple evolution by catching targeted dragon-types not only challenges core gameplay mechanics but also celebrates the community's dedication. This layered approach to in-game progression means that success is determined by both strategic foresight and immersive interaction with the game’s world. By engaging with these interactive systems, trainers experience a sense of personal growth that goes hand in hand with the larger narrative of seasonal celebration.
Autumn's Transformative Journey: Evolving Pokémon in the Har...
Autumn imbues the Pokémon world with fresh discoveries and unexpected evolutions, inviting players to immerse themselves in a season of vibrant change. The Harvest Festival event breathes new life into the game, showcasing themed Pokémon and unique evolutionary paths that challenge trainers to think strategically. This period is highlighted by inventive tasks and a sense of playful urgency. With intriguing evolutions and specialized items to collect, the gameplay expands beyond simple catching into a pursuit of rewards tied to the season. The following sections delve into the evolving dynamics of gameplay, detailed mechanics for evolution, the aesthetics of seasonal design, and the multifaceted strategies that players can adopt to master these captivating challenges.
Celebrating Autumn Adventures in Pokémon Go
The seasonal transformation brings a festive energy that redefines the Pokémon Go experience. As the crisp air of fall arrives, players are greeted by a surge of themed Pokémon, each carrying the spirit of the season. The The annual Harvest Festival is set to take place starting October 10 and continuing until… 16, brings with it the promise of both familiar and novel challenges. Not only do the game’s overall ambiance and visuals change to reflect autumn’s hues, but the event also introduces special evolutions like Dipplin and its evolved form, Hydrapple. The game’s interactive elements become charged with the excitement of a seasonal celebration. Trails along the community paths now lead to specialized PokeStops where essential items are hidden, linking the festive atmosphere to tangible rewards in gameplay.
Uncovering New Evolutionary Paths
In this season of change, evolution takes on a new dimension as players explore alternative developmental paths for their Pokémon. Dipplin emerges as a captivating alternate evolution of Applin, originally hinted at in previous adventures. This evolution is not solely about upgrading a Pokémon but about engaging in a quest that requires resourcefulness and persistence. Trainers must manage scarce resources while working towards transforming their Applin into Dipplin. The game’s mechanics are designed to compel players to engage with events on a deeper level, mixing strategy with a touch of luck. Unique items, such as Syrupy Apples, become the cornerstone of this evolutionary process, reinforcing the idea that every interaction in Pokémon Go during this event can lead to rewarding and unexpected transformations.
Syrupy Apple Collection and PokéStop Journeys
The quest for Syrupy Apples stands as a testament to factional challenge during the Harvest Festival event. These special items are not scattered arbitrarily; they are strategically placed at designated PokeStops to encourage exploration and community engagement. As trainers wander through new and familiar neighborhoods, they must hunt for these apples with determined persistence. The process requires attentiveness, as each PokeStop may offer the opportunity to collect this crucial ingredient. However, collecting Syrupy Apples is not without its challenges, as random encounters with wild Pokémon can occur during the process, adding an unexpected twist to the collection journey. This intertwining of exploration and strategy transforms the simple act of item collection into a rewarding experience that deepens the immersive qualities of Pokémon Go.
Candy Accumulation and Evolutionary Demands
Collecting candy is a familiar yet essential task in the Pokémon world, now intertwined with the unique demand of evolving Dipplin. Players must amass a significant 200 Applin Candy to trigger the initial evolution into Dipplin, a testament to the game’s layered progression system. This accumulation requires consistent engagement and tactical planning, prompting trainers to participate actively in catching events and utilizing bonus mechanisms like Pinap Berries to maximize candy gains. Striking the right balance between effort and reward becomes essential as trainers navigate the demands of limited-time events and evolving gameplay mechanics. The resource management aspect in Pokémon Go reinforces the message that each catch and every move has a direct impact on a trainer's evolutionary journey, blending strategy with the familiar thrill of discovery.
The Challenge of Evolving Dipplin into Hydrapple
In the pursuit of new heights, evolving Dipplin into Hydrapple introduces an additional layer of strategic challenge. Unlike the initial evolution, transforming Dipplin requires an even greater commitment: accumulating 400 Applin Candy. However, the challenge does not end with gathering candy alone. Trainers are tasked with the unusual mission of catching seven dragon-type Pokémon while having Dipplin set as their buddy. This requirement to engage with a specific subset of Pokémon introduces an intricate twist to the evolution process. It compels trainers to tailor their catching strategies, weighing the benefits of continued candy collection against the need to focus on dragon-type encounters. This multi-step evolution is emblematic of Pokémon Go's effort to evolve game mechanics that demand both dedication and diversified gameplay strategies.
Diverse Tactics for Candy Gathering
Navigating the world of candy collection is a nuanced endeavor that underscores the strategic depth of Pokémon Go. Players are encouraged to employ a variety of techniques to efficiently gather the necessary resources for evolving their Pokémon. Utilizing Pinap Berries during catches emerges as a favored tactic, effectively doubling the candy reward and directly impacting the progress toward evolution. Beyond this, Transforming Rare Candy into the exact candy necessary for Applin development offers an alternative when standard means seem too slow. The event's surge in Applin appearances during the Harvest Festival further fuels the potential for rapid candy gathering. This interplay of tactics and in-game feature exploitation reflects a game design that rewards both perseverance and smart resource management, turning every encounter in the wild into an opportunity to inch closer to transformative evolution.
Gameplay Dynamics and Buddy Encounters
The evolving experience of Pokémon Go during seasonal events is deeply enriched by the integration of buddy mechanics and specialized encounters. When trainers set Dipplin as their buddy, their journey takes on a layered complexity, especially given the additional requirement to capture dragon-type Pokémon before reaching Hydrapple evolution. This feature encourages a more dynamic gameplay style where players must balance the routine of daily catches with the challenge of targeting specific Pokémon types. The buddy system not only serves as a pathway for evolution but also creates moments of serendipity and enhanced teamwork between the trainer and their Pokémon. These encounters foster a sense of companionship and trust, proving that success in Pokémon Go is as much about understanding and collaboration as it is about strategic resource allocation.
Visual and Tonal Aesthetics of the Festival
The visual transformation during the Harvest Festival event encapsulates the beauty of seasonal change in a richly immersive environment. The game’s interface subtly shifts to reflect autumnal hues, with warm tones and creative autumn-themed decorations enhancing the overall ambiance. This period is marked by a careful blend of functionality and artistry, where the design of PokeStops and in-game items like Syrupy Apples visually communicates the spirit of fall. The visual Indicators not only enhance the visual appeal but also fulfill additional functions practical hints to players about potential rewards and game mechanics. The stunning art direction instills a sense of wonder and encourages players to explore every corner, making each discovery feel significantly rewarding. The harmonious integration of art, gameplay, and seasonal narrative transforms Pokémon Go into a canvas that celebrates nature's transition.
Event-Driven Discoveries and Interactive Quests
The Harvest Festival event opens doors to interactive quests that expand the narrative beyond standard gameplay. Engaging with this event requires players to look for specialized items that drive their progress toward new evolutions. The collection of Syrupy Apples and the management of Applin Candy transform daily catches into pivotal moments of strategy and exploration. Gamers are encouraged to dive headfirst into a series of mini-adventures that challenge them to balance resource management with situational decision-making. These quests are designed to be both straightforward and layered in complexity, ensuring that veteran players and newcomers alike find the experience engaging. The goals are intricately intertwined with the event’s celebratory atmosphere, prompting trainers to explore the game world more intently and uncover hidden opportunities that only materialize during this unique seasonal window.
Seasonal Adaptations and Evolving Environments
The game’s commitment to dynamic, season-specific content ensures that each event is a unique narrative experience. As Pokémon Go evolves with seasonal themes, trails previously seen as routine become the backdrop for extraordinary tales of transformation and progress. Trainers adapt to environments where traditional gameplay meets innovative event-specific mechanics. Harvest Festival is a prime example where traditional tasks, such as collecting candy and items, align with broader event goals while requiring specialized strategies to secure evolutionary milestones like Dipplin and Hydrapple. This adaptive design encourages players to explore different facets of gameplay, reshaping their typical approaches and enhancing their engagement with the game world. The evolving event environment "serves as undeniable proof of the game developers’ creativity and hard work"’ commitment to continuously refreshing the experience for a dedicated global community.
Interactive Mechanics and In-Game Milestones
A significant aspect of Pokémon Go during special events is the interplay between interactive mechanics and personal achievement milestones. With the introduction of unique items like Syrupy Apples and the goal of evolving Applin, players are entrusted with balancing immediate rewards against long-term objectives. Each collected apple and every candy unit contributes to a larger narrative of progression, where measured efforts culminate in obtaining rare and coveted evolutions. The structure of achieving a Hydrapple evolution by catching targeted dragon-types not only challenges core gameplay mechanics but also celebrates the community's dedication. This layered approach to in-game progression means that success is determined by both strategic foresight and immersive interaction with the game’s world. By engaging with these interactive systems, trainers experience a sense of personal growth that goes hand in hand with the larger narrative of seasonal celebration.
- Grace Lee
- 2026-03-09
-
![img]() nDreams Restructures Operations Amid VR Industry Headwinds The virtual reality developer nDreams has announced it will wind down two of its studios, a decision that poses a significant challenge for its workforce. This change signals a broader industry trend of reducing teams and consolidating operations as market conditions in VR gaming remain tough.
In recent developments, the company disclosed that its Brighton-based studio, Near Light, along with the Farnborough location known as Compass, will be closing. The impact of these closures is anticipated to affect approximately 78 positions, while around 120 employees will remain at the main Elevation studio to continue work on several as-yet undisclosed projects.
The restructuring comes after earnest efforts were made to optimize the existing framework and avoid such outcomes. The management emphasized that, given the competitive nature of the VR games sector, further adjustments are essential to secure a sustainable and commercially viable future.
Elevation will serve as the central hub for current and future projects, employing about 120 team members on secret initiatives.
A lean group will also be preserved to focus on research and development in XR technologies.
The company is set to begin a collective consultation process with all staff impacted by these changes, ensuring assistance and support are provided throughout what promises to be a challenging transition.
This move reflects nDreams’ commitment to exploring every option to retain vital talent while streamlining operations to more effectively align with the continuously shifting requirements of the virtual reality market.
nDreams Restructures Operations Amid VR Industry Headwinds The virtual reality developer nDreams has announced it will wind down two of its studios, a decision that poses a significant challenge for its workforce. This change signals a broader industry trend of reducing teams and consolidating operations as market conditions in VR gaming remain tough.
In recent developments, the company disclosed that its Brighton-based studio, Near Light, along with the Farnborough location known as Compass, will be closing. The impact of these closures is anticipated to affect approximately 78 positions, while around 120 employees will remain at the main Elevation studio to continue work on several as-yet undisclosed projects.
The restructuring comes after earnest efforts were made to optimize the existing framework and avoid such outcomes. The management emphasized that, given the competitive nature of the VR games sector, further adjustments are essential to secure a sustainable and commercially viable future.
Elevation will serve as the central hub for current and future projects, employing about 120 team members on secret initiatives.
A lean group will also be preserved to focus on research and development in XR technologies.
The company is set to begin a collective consultation process with all staff impacted by these changes, ensuring assistance and support are provided throughout what promises to be a challenging transition.
This move reflects nDreams’ commitment to exploring every option to retain vital talent while streamlining operations to more effectively align with the continuously shifting requirements of the virtual reality market.
- Grace Lee
- 2026-03-09
-
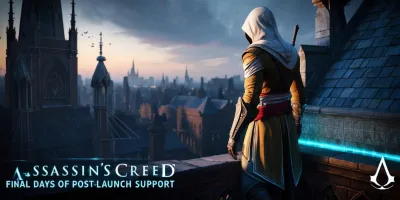
![img]() Assassin's Creed Shadows: Final Days of Post-Launch Support This update marks a turning point for Assassin's Creed Shadows as its primary support gradually comes to a close. With the one-year mark on the horizon, Ubisoft has provided an updated outlook on the series, offering insight into what lies ahead.
Now that the bulk of the post-launch material has been delivered, the game is set to experience a gradual tapering of updates. Ubisoft is ready to shift focus and resources toward upcoming projects, while still planning a few last-minute surprises.
Ubisoft has mentioned that the game is transitioning into its final support stage, which means The updates will gradually shrink in size and be released less often as… attention moves toward the future developments within the Assassin's Creed universe.
The coming weeks will include a special stream to celebrate the first anniversary along with further patches. However, players should not anticipate extensive new content moving forward.
Assassin's Creed Shadows: Final Days of Post-Launch Support This update marks a turning point for Assassin's Creed Shadows as its primary support gradually comes to a close. With the one-year mark on the horizon, Ubisoft has provided an updated outlook on the series, offering insight into what lies ahead.
Now that the bulk of the post-launch material has been delivered, the game is set to experience a gradual tapering of updates. Ubisoft is ready to shift focus and resources toward upcoming projects, while still planning a few last-minute surprises.
Ubisoft has mentioned that the game is transitioning into its final support stage, which means The updates will gradually shrink in size and be released less often as… attention moves toward the future developments within the Assassin's Creed universe.
The coming weeks will include a special stream to celebrate the first anniversary along with further patches. However, players should not anticipate extensive new content moving forward.
- Landon White
- 2026-03-09
-
![img]() Revitalizing Heritage: A Journey to Rebuild the Island Café Animal Crossing: New Horizons continues to expand its universe with fresh updates that embrace nostalgia and innovation simultaneously. The latest update, known as 2.0, invites players to revisit cherished elements from past series entries while integrating new adventures that promise to reshape the gameplay experience. Central among these changes is the reintroduction of a beloved café, sparking curiosity and excitement among fans. The update encourages island dwellers to seek out a famed character whose return promises a journey filled with hidden challenges and delightful surprises. Not only does this change enhance the communal aspect of island life, but it also enriches gameplay with tasks that blend exploration, resource gathering, and community building. This unique blend of old and new creates an engaging narrative for both seasoned players and newcomers alike.
Museum Conversations and the Spark of Revival
In the early moments of this update, players find themselves drawn to the museum, a longtime hub of island history and discovery. Here, Blathers, the knowledgeable curator, reveals that the revival of the cherished café is on the horizon. His conversations hint at the necessity of finding a renowned character from past experiences, who is known for his distinctive style and passion for gyroids. Blathers shares a treasured photo of this character and tasks players with the mission of tracking him down. The dialogue intertwines memories with the promise of a tangible project on the island, setting the stage for an engaging quest. This narrative thread connects the cultural legacy of previous games to the new mechanics introduced in the update, inviting players to embark on a journey that pays tribute to its roots while integrating cutting-edge gaming mechanics challenges.
Embarking on the Mystical Island Tour
Once the task is established at the museum, the next intriguing step revolves around embarking on a unique island boat tour. At the island dock, players encounter a jaunty character whose role as an island guide is both endearing and pivotal. With a modest fee of 1,000 Nook Miles, adventurers can board his vessel for a day’s journey to a mystery island, a welcome diversion from the daily routine. The ride itself is punctuated by a lively sea shanty that players are encouraged to interact with, adding rhythmic fun to the adventure. This carefully constructed experience mirrors past escapades while integrating a modern twist, offering not only exploration of new geographical areas but also opportunities to uncover hidden characters and collectible items along the way.
Finding the Iconic Character on New Grounds
Upon arrival at the mystery island, the central quest takes a delightful turn with the appearance of the much-anticipated character. His presence seems almost preordained as he naturally emerges during the initial island expedition. Players are prompted to initiate a conversation by mentioning the recommendation from Blathers, sealing the deal for his forthcoming participation on the island. This character’s reintroduction feels seamless, as if the universe has long awaited his return. He quickly makes the decision to join the island community, thereby setting in motion the development of the cozy café. His brief interaction, imbued with charm and simplicity, not only reassures players about the ease of recruiting him but also underscores the game’s penchant for mixing storytelling with interactive tasks that feel both nostalgic and exhilarating.
Initiating the Construction of a Beloved Hangout
With the iconic character now committed to the island, the process shifts toward constructing the café itself. Back at the museum, players are encouraged to report the successful recruitment, thereby triggering further actions essential for the build. Blathers provides specific instructions geared toward helping the island prepare for this new cultural hub. A unique sequence unfolds, involving a temporary closure of the museum—a sacrifice that hints at the scale of construction ahead. This step-by-step guidance not only guarantees that players are continuously immersed in the task but also enhances the narrative by subtly emphasizing the interrelationship between art, history, and community life. The prospect of enjoying coffee in a newly built space injects fresh life into island community interactions, as characters and visitors alike gather to share experiences in a familiar yet revitalized environment.
Unveiling Aesthetic Nuances and Design Elements
The architectural renaissance within the museum extends to the design of the café itself, imbuing the space with both modern flair and classic charm. The update pays homage to earlier designs, ensuring that longtime fans experience a sense of déjà vu while exploring new layouts and décor options. The café’s placement upstairs and adjacent to the art sector in the museum underscores the melding of culture and utility. The interior is expected to offer more than just a place for refreshment; it is designed to be an interactive environment where characters can mingle, and visitors can enjoy artfully crafted presentations. This creative design fosters a warm ambiance that invites communal activities, encouraging a blend of vibrant social exchanges and solitary appreciation of the surroundings, thereby enriching the island’s aesthetic narrative.
Integrating Interactive Features and Social Dynamics
Beyond its visual appeal, the café introduces a multitude of interactive Attributes designed to engage a diverse range of gamers engagements. Once operational, it will serve not only as a locale for enjoying freshly brewed beverages but also as a social nexus where residents and visitors can connect. With the integration of Amiibo figures or cards, players will be able to invite a variety of personalities to share the space, adding layers of dynamic interactions throughout the island. The feature of hosting other players for a leisurely cup of coffee further reinforces the game’s social fabric, where the pursuit of communal harmony meets the thrill of personal accomplishment. Each interaction within the café carries with it a promise of Cultivating collective experiences that reverberate with the underlying essence of multiplayer connectivity, a core pillar of the Animal Crossing experience.
Discovering and Cultivating Hidden Treasures
The quest for the café is multifaceted, intertwining discovery with cultivation in inventive ways. While the character’s recruitment sets off the main storyline, players are also encouraged to engage in subtle exploration of their mystery island. During the tour, opportunities abound to uncover additional gyroid fragments hidden within the island’s terrain, beneath rocks, or inside fossil sites waiting to be excavated. Each fragment contributes to the broader process of not only restoring the legacy of the beloved café but also enhancing the overall island ecosystem. This secondary quest line allows keen observers to delve deeper into the world’s secret treasures, providing a satisfying layer of reward-based exploration. The act of collecting these fragments aligns with the game’s emphasis on detailed, layered interactions, blending meticulous attention to detail with the broader narrative of communal transformation.
Embracing a Renewed Sense of Island Community
The ongoing update goes beyond mechanical upgrades—it breathes new life into the fabric of island society. The arrival of the reimagined café encapsulates a blend of nostalgia, community spirit, and technological ingenuity. Characters previously familiar to dedicated fans reappear, reinforcing established friendships while opening the door to novel interactions. The game's design brilliantly captures the nuances of everyday island life, where routine tasks are imbued with significance and where each new addition contributes to the evolving storyline. This dynamic transformation underscores the importance of gathering spaces in creating a lively, interconnected community. The meticulously designed architecture and thoughtfully planned interactions encourage residents to forge closer bonds and explore new dimensions of social gameplay, all set against the backdrop of an ever-evolving island paradise.
Enhancing Gameplay Through Engaging Mechanisms
The update’s ingenuity lies in how it seamlessly interweaves classic gameplay mechanics with fresh, engaging quests. From initiating conversations with the museum’s curator to navigating the island on a guided boat tour, every step is designed to elicit a sense of wonder and accomplishment. The game guides players through each stage with a blend of clear instructions and subtle hints, ensuring that no aspect of the journey feels arbitrary. Standard tasks, like digging up fossils or interacting with natural elements, are integrated into the larger narrative of restoring and celebrating community life. The act of spotting hidden objects and piecing together fragmented clues invites players to become active participants in crafting their island story, reinforcing the game's emphasis on exploration, creativity, and thoughtful interaction across its dynamic landscape.
Celebrating Nostalgia While Embracing the Future
A unique aspect of the update is its ability to evoke sentimental memories while charting a course toward new horizons. The reintroduction of the café embodies more than a simple homage to the series’ storied past; it represents a deliberate effort to keep legacy alive in an ever-evolving digital milieu. The familiar figure who once managed a well-loved establishment returns with renewed vigor, symbolizing a bridge between eras. This balancing act of retaining cherished traditions while innovating for the Anticipating what's next enriches the entire experience with an added layer of emotional complexity. Players are invited to appreciate the continuity of themes, where daily routines interlace with the thrill of discovery in a world that constantly rewards curiosity and community participation with delightful surprises at every corner.
Balancing Resource Management with Creative Exploration
The process of reviving the café introduces a nuanced element of resource management into the gameplay narrative. Players must strategically invest time and in-game currency to nurture both the tangible and conceptual elements of island life. Initiating construction, tending to gyroid fragments, and engaging with tour guides all factor into an intricate balance between routine and celebration. This dynamic encourages players to plan their in-game actions carefully, ensuring every step taken contributes to the broader vision of a thriving community space. The interplay between hands-on activities and immersive storytelling challenges individuals to cultivate not only their island's prosperity but also the intangible aspect of shared history and cultural vibrancy. Each choice, regardless of how insignificant it might appear, becomes a part of the richly woven tapestry that defines the island’s character.
Revitalizing Heritage: A Journey to Rebuild the Island Café Animal Crossing: New Horizons continues to expand its universe with fresh updates that embrace nostalgia and innovation simultaneously. The latest update, known as 2.0, invites players to revisit cherished elements from past series entries while integrating new adventures that promise to reshape the gameplay experience. Central among these changes is the reintroduction of a beloved café, sparking curiosity and excitement among fans. The update encourages island dwellers to seek out a famed character whose return promises a journey filled with hidden challenges and delightful surprises. Not only does this change enhance the communal aspect of island life, but it also enriches gameplay with tasks that blend exploration, resource gathering, and community building. This unique blend of old and new creates an engaging narrative for both seasoned players and newcomers alike.
Museum Conversations and the Spark of Revival
In the early moments of this update, players find themselves drawn to the museum, a longtime hub of island history and discovery. Here, Blathers, the knowledgeable curator, reveals that the revival of the cherished café is on the horizon. His conversations hint at the necessity of finding a renowned character from past experiences, who is known for his distinctive style and passion for gyroids. Blathers shares a treasured photo of this character and tasks players with the mission of tracking him down. The dialogue intertwines memories with the promise of a tangible project on the island, setting the stage for an engaging quest. This narrative thread connects the cultural legacy of previous games to the new mechanics introduced in the update, inviting players to embark on a journey that pays tribute to its roots while integrating cutting-edge gaming mechanics challenges.
Embarking on the Mystical Island Tour
Once the task is established at the museum, the next intriguing step revolves around embarking on a unique island boat tour. At the island dock, players encounter a jaunty character whose role as an island guide is both endearing and pivotal. With a modest fee of 1,000 Nook Miles, adventurers can board his vessel for a day’s journey to a mystery island, a welcome diversion from the daily routine. The ride itself is punctuated by a lively sea shanty that players are encouraged to interact with, adding rhythmic fun to the adventure. This carefully constructed experience mirrors past escapades while integrating a modern twist, offering not only exploration of new geographical areas but also opportunities to uncover hidden characters and collectible items along the way.
Finding the Iconic Character on New Grounds
Upon arrival at the mystery island, the central quest takes a delightful turn with the appearance of the much-anticipated character. His presence seems almost preordained as he naturally emerges during the initial island expedition. Players are prompted to initiate a conversation by mentioning the recommendation from Blathers, sealing the deal for his forthcoming participation on the island. This character’s reintroduction feels seamless, as if the universe has long awaited his return. He quickly makes the decision to join the island community, thereby setting in motion the development of the cozy café. His brief interaction, imbued with charm and simplicity, not only reassures players about the ease of recruiting him but also underscores the game’s penchant for mixing storytelling with interactive tasks that feel both nostalgic and exhilarating.
Initiating the Construction of a Beloved Hangout
With the iconic character now committed to the island, the process shifts toward constructing the café itself. Back at the museum, players are encouraged to report the successful recruitment, thereby triggering further actions essential for the build. Blathers provides specific instructions geared toward helping the island prepare for this new cultural hub. A unique sequence unfolds, involving a temporary closure of the museum—a sacrifice that hints at the scale of construction ahead. This step-by-step guidance not only guarantees that players are continuously immersed in the task but also enhances the narrative by subtly emphasizing the interrelationship between art, history, and community life. The prospect of enjoying coffee in a newly built space injects fresh life into island community interactions, as characters and visitors alike gather to share experiences in a familiar yet revitalized environment.
Unveiling Aesthetic Nuances and Design Elements
The architectural renaissance within the museum extends to the design of the café itself, imbuing the space with both modern flair and classic charm. The update pays homage to earlier designs, ensuring that longtime fans experience a sense of déjà vu while exploring new layouts and décor options. The café’s placement upstairs and adjacent to the art sector in the museum underscores the melding of culture and utility. The interior is expected to offer more than just a place for refreshment; it is designed to be an interactive environment where characters can mingle, and visitors can enjoy artfully crafted presentations. This creative design fosters a warm ambiance that invites communal activities, encouraging a blend of vibrant social exchanges and solitary appreciation of the surroundings, thereby enriching the island’s aesthetic narrative.
Integrating Interactive Features and Social Dynamics
Beyond its visual appeal, the café introduces a multitude of interactive Attributes designed to engage a diverse range of gamers engagements. Once operational, it will serve not only as a locale for enjoying freshly brewed beverages but also as a social nexus where residents and visitors can connect. With the integration of Amiibo figures or cards, players will be able to invite a variety of personalities to share the space, adding layers of dynamic interactions throughout the island. The feature of hosting other players for a leisurely cup of coffee further reinforces the game’s social fabric, where the pursuit of communal harmony meets the thrill of personal accomplishment. Each interaction within the café carries with it a promise of Cultivating collective experiences that reverberate with the underlying essence of multiplayer connectivity, a core pillar of the Animal Crossing experience.
Discovering and Cultivating Hidden Treasures
The quest for the café is multifaceted, intertwining discovery with cultivation in inventive ways. While the character’s recruitment sets off the main storyline, players are also encouraged to engage in subtle exploration of their mystery island. During the tour, opportunities abound to uncover additional gyroid fragments hidden within the island’s terrain, beneath rocks, or inside fossil sites waiting to be excavated. Each fragment contributes to the broader process of not only restoring the legacy of the beloved café but also enhancing the overall island ecosystem. This secondary quest line allows keen observers to delve deeper into the world’s secret treasures, providing a satisfying layer of reward-based exploration. The act of collecting these fragments aligns with the game’s emphasis on detailed, layered interactions, blending meticulous attention to detail with the broader narrative of communal transformation.
Embracing a Renewed Sense of Island Community
The ongoing update goes beyond mechanical upgrades—it breathes new life into the fabric of island society. The arrival of the reimagined café encapsulates a blend of nostalgia, community spirit, and technological ingenuity. Characters previously familiar to dedicated fans reappear, reinforcing established friendships while opening the door to novel interactions. The game's design brilliantly captures the nuances of everyday island life, where routine tasks are imbued with significance and where each new addition contributes to the evolving storyline. This dynamic transformation underscores the importance of gathering spaces in creating a lively, interconnected community. The meticulously designed architecture and thoughtfully planned interactions encourage residents to forge closer bonds and explore new dimensions of social gameplay, all set against the backdrop of an ever-evolving island paradise.
Enhancing Gameplay Through Engaging Mechanisms
The update’s ingenuity lies in how it seamlessly interweaves classic gameplay mechanics with fresh, engaging quests. From initiating conversations with the museum’s curator to navigating the island on a guided boat tour, every step is designed to elicit a sense of wonder and accomplishment. The game guides players through each stage with a blend of clear instructions and subtle hints, ensuring that no aspect of the journey feels arbitrary. Standard tasks, like digging up fossils or interacting with natural elements, are integrated into the larger narrative of restoring and celebrating community life. The act of spotting hidden objects and piecing together fragmented clues invites players to become active participants in crafting their island story, reinforcing the game's emphasis on exploration, creativity, and thoughtful interaction across its dynamic landscape.
Celebrating Nostalgia While Embracing the Future
A unique aspect of the update is its ability to evoke sentimental memories while charting a course toward new horizons. The reintroduction of the café embodies more than a simple homage to the series’ storied past; it represents a deliberate effort to keep legacy alive in an ever-evolving digital milieu. The familiar figure who once managed a well-loved establishment returns with renewed vigor, symbolizing a bridge between eras. This balancing act of retaining cherished traditions while innovating for the Anticipating what's next enriches the entire experience with an added layer of emotional complexity. Players are invited to appreciate the continuity of themes, where daily routines interlace with the thrill of discovery in a world that constantly rewards curiosity and community participation with delightful surprises at every corner.
Balancing Resource Management with Creative Exploration
The process of reviving the café introduces a nuanced element of resource management into the gameplay narrative. Players must strategically invest time and in-game currency to nurture both the tangible and conceptual elements of island life. Initiating construction, tending to gyroid fragments, and engaging with tour guides all factor into an intricate balance between routine and celebration. This dynamic encourages players to plan their in-game actions carefully, ensuring every step taken contributes to the broader vision of a thriving community space. The interplay between hands-on activities and immersive storytelling challenges individuals to cultivate not only their island's prosperity but also the intangible aspect of shared history and cultural vibrancy. Each choice, regardless of how insignificant it might appear, becomes a part of the richly woven tapestry that defines the island’s character.
- Grace Lee
- 2026-02-23
-
![img]() Multiplayer Tower-Climbing Adventure: A New Era in Card Batt... A highly anticipated update is coming soon for aficionados of the… renowned deck-building challenge. The upcoming sequel is set to bring a fresh multiplayer dimension that promises to redefine how enthusiasts experience the tower-climbing adventure.
In the coming month, the follow-up will debut as an Early Access offering on Steam this autumn following a postponement. With the release date drawing near, the developer has refreshed the product page with details confirmed by a reputable source, revealing a new component designed to please the audience.
The latest addition allows gamers the freedom to embark on the climb on their own or Unite with as many as three other players. The cooperative mode includes elements such as:
Content tailored for multiplayer gameplay
Unique cards exclusive to group battles
Enhanced interactions that promote strong team dynamics
The original game made its debut in 2019, initially garnering moderate attention. However, it gradually captivated a larger following, owing much of its appeal to inventive card battles combined with a challenging ascent through a mysterious tower. Sales have reached impressive levels, with estimates nearing ten million copies and a steady daily player base numbering in the tens of thousands.
The introduction of four-player mode is expected to transform the overall experience, potentially elevating the fun and strategic depth of the encounter. As the Early Access phase launches next month, further insights will reveal the true impact of this innovative multiplayer feature.
Multiplayer Tower-Climbing Adventure: A New Era in Card Batt... A highly anticipated update is coming soon for aficionados of the… renowned deck-building challenge. The upcoming sequel is set to bring a fresh multiplayer dimension that promises to redefine how enthusiasts experience the tower-climbing adventure.
In the coming month, the follow-up will debut as an Early Access offering on Steam this autumn following a postponement. With the release date drawing near, the developer has refreshed the product page with details confirmed by a reputable source, revealing a new component designed to please the audience.
The latest addition allows gamers the freedom to embark on the climb on their own or Unite with as many as three other players. The cooperative mode includes elements such as:
Content tailored for multiplayer gameplay
Unique cards exclusive to group battles
Enhanced interactions that promote strong team dynamics
The original game made its debut in 2019, initially garnering moderate attention. However, it gradually captivated a larger following, owing much of its appeal to inventive card battles combined with a challenging ascent through a mysterious tower. Sales have reached impressive levels, with estimates nearing ten million copies and a steady daily player base numbering in the tens of thousands.
The introduction of four-player mode is expected to transform the overall experience, potentially elevating the fun and strategic depth of the encounter. As the Early Access phase launches next month, further insights will reveal the true impact of this innovative multiplayer feature.
- Landon White
- 2026-02-23
-
![img]() Action-Packed Future: Netflix Series Prepares for a Thrillin... This action-drama series has achieved outstanding success on Netflix, drawing a huge audience and prompting the streaming platform to add extra installments due to overwhelming fan support. The initial debut captured viewers’ interest and paved the way for further developments.
Following the series’ debut, the second part was Debuting in early 2025, and the third installment became available just this week. Enthusiasts of the show have now turned their attention "regarding what the upcoming season may bring".
While there is no formal announcement for a fourth installment yet, the series’ creator remains optimistic concerning its upcoming prospects. Recently, during an interview with a notable industry publication, he revealed that a creative team has already been assembled for the upcoming season, demonstrating confidence that the production schedule can meet Netflix’s demand for an annual new release.
Our innovative team has been fully immersed in their creative endeavors, developing the plot and preparing a number of scripts, with story ideas already under discussion. Production decisions are already influenced by industry timelines, including specific deadlines tied to financial incentives.
Reflecting on his extensive background in television, the creator noted that the current production pace is far less demanding than previous experiences. In earlier projects, large numbers of episodes had to be completed in a short period. The current schedule offers a more relaxed timeline, allowing for careful development and refinement.
Key points:
Season 2 debuted in early 2025
Season 3 released recently
The creative team for Season 4 is already in place
Production timelines are being managed to align with financial incentives
Do you have a genuine passion for this series and looking forward to a continuation of its story in what could be a new season in the near future?
Action-Packed Future: Netflix Series Prepares for a Thrillin... This action-drama series has achieved outstanding success on Netflix, drawing a huge audience and prompting the streaming platform to add extra installments due to overwhelming fan support. The initial debut captured viewers’ interest and paved the way for further developments.
Following the series’ debut, the second part was Debuting in early 2025, and the third installment became available just this week. Enthusiasts of the show have now turned their attention "regarding what the upcoming season may bring".
While there is no formal announcement for a fourth installment yet, the series’ creator remains optimistic concerning its upcoming prospects. Recently, during an interview with a notable industry publication, he revealed that a creative team has already been assembled for the upcoming season, demonstrating confidence that the production schedule can meet Netflix’s demand for an annual new release.
Our innovative team has been fully immersed in their creative endeavors, developing the plot and preparing a number of scripts, with story ideas already under discussion. Production decisions are already influenced by industry timelines, including specific deadlines tied to financial incentives.
Reflecting on his extensive background in television, the creator noted that the current production pace is far less demanding than previous experiences. In earlier projects, large numbers of episodes had to be completed in a short period. The current schedule offers a more relaxed timeline, allowing for careful development and refinement.
Key points:
Season 2 debuted in early 2025
Season 3 released recently
The creative team for Season 4 is already in place
Production timelines are being managed to align with financial incentives
Do you have a genuine passion for this series and looking forward to a continuation of its story in what could be a new season in the near future?
- Landon White
- 2026-02-23
-
![img]() Feline Fury: Navigating Chaos in a Tactically Unpredictable... The game unfolds as an unpredictable and boldly imaginative fusion that celebrates both strategic mastery and quirky design. In a world where felines wield impressive combat skills, players are drawn into a universe where every decision resonates with risk, opportunity, and rapid tactical evolution. The experience challenges traditional norms in turn-based arenas, requiring players to think several steps ahead while juggling the whims of fate and randomness alike. Inspired by celebrated predecessors yet distinct in its own irreverent spirit, the game invites enthusiasts to experiment with diverse playstyles, discover hidden interactions, and embrace chaos in the pursuit of victory.
The Versatile Archer Archetype Reimagined
The game introduces a remarkably adaptable combat specialist reminiscent of the classic archer but expanded into something far more intricate. This agile fighter, commonly known as the Ranger, can transform into a precision assassin with enhanced ranged damage and critical strikes that neutralize foes from afar. Alternatively, the character morphs into a rapid-fire specialist, unleashing multiple attacks in one turn to suppress enemy clusters. With a capacity to deploy traps that regulate the enemy’s movements and summon auxiliary entities for crowd control, this archetype embodies the strategic fluidity that defines the game. Every encounter with the Ranger forces players to evaluate risk and reward dynamically, challenging them to balance offensive upgrades with the need for tactical reactivity.
Intricate Combat Arenas and Tactical Engagements
Set in claustrophobic, arena-based battlefields, the game's design echoes the tight, turn-based combat of classic strategy titles. Each encounter is staged on environments that range from grimy urban alleys adorned with scattered debris to unconventional territories where the enemy might be as unexpected as a wandering stray. The emphasis on spatial positioning and movement nuance transforms each skirmish into a mini chess match. Players must rapidly adapt their formation as unpredictable adversaries move through the arena. Every decision counts; even a momentary lapse in positioning can expose valuable units to overwhelming counterattacks. In these settings, the balance of aggression and defense is paramount, and every turn serves as a test of both quick strategy and measured execution.
Dynamic Partnerships and High-Stakes Synergy
Central to the game’s layered complexity is the interplay between specialized characters and their evolving synergies. One memorable combination involves pairing an upgraded Ranger with a supportive Cleric whose abilities extend beyond simple healing. In this interaction, the Cleric designates a key figure whose power is amplified dramatically. On a critical turn during a major confrontation, this synergy can induce monumental effects on enemy health bars, shifting the balance of power in a heartbeat. However, such powerful combinations come with intricate risks, as certain enemy behaviors may trigger devastating counter-effects if not managed carefully. This dance of coordinated timing and upgraded abilities adds a rich layer of tactical suspense and Compels players to routinely rethink their tactics.
Roguelike Ethos and Ever-Changing Felines
The game firmly embraces the roguelike tradition of unpredictability, ensuring that no two runs are identical. Here, feline protagonists become both the heroes and the casualties of exploration. Once a cat completes its expedition, it is retired from active combat, passing its legacy to subsequent generations. This constant turnover requires players to continually invest in new roles, gear, and tactical experiments. Each new team Here's an alternative phrasing that maintains the original context:
"has been completely developed from scratch, and the" evolving skill sets of your feline units are both a blessing and a challenge. Randomized enemy encounters and unpredictable arena events create layers of complexity that demand dynamic planning. This commitment to impermanence ensures that every foray is a fresh puzzle, where both fortunes and failures sculpt the narrative of your ongoing campaign.
Unpredictable Encounters and Strategic Variance
Random events and unforeseen enemy maneuvers are "Intricately intertwined with the very core of the game.", ensuring that the path to victory is constantly shifting. Not every scenario unfolds as anticipated; a positive event in one moment can cascade into complications the next. Felines may temporarily acquire adverse traits that interfere with their usual routines, causing them to retreat in disarray just when coordinated strikes are crucial. These moments of chaos force players to recalibrate their plans on the fly, emphasizing the importance of adaptability over rigid, pre-conceived strategies. As players learn to navigate this spectrum of unpredictability, the game rewards resourcefulness and creative problem-solving, making every successful round feel like a hard-fought triumph born of persistence.
Innovative Breeding and Lineage Development
The breeding system ventures beyond straightforward progression, offering a unique twist to character development. Success in the game depends not only on immediate combat prowess but also on nurturing a lineage of capable feline warriors. Retired warriors, when provided with a comfortable base and proper resources, give rise to offspring imbued with improved attributes. However, the process is far from simple, as the genetic outcomes can vary unpredictably. Players may spend several turns attempting to combine the traits of specific classes, only to face unexpected behavioral quirks or mismatched characteristics in their progeny. This delicate balancing act between ambition and the natural randomness of breeding adds another layer of strategy, ensuring that long-term planning is as critical as the immediate tactical decisions on the field.
Ruthless Encounter Design and Tactical Sacrifice
While the game is deeply strategic, its encounter design does not shy away from putting players in impossible scenarios. The thematic approach does not lean on tidy, sugar-coated difficulties; instead, it revels in tightly wound battles where every move is fraught with existential risk. Boss encounters, in particular, are designed to challenge highly optimized builds by introducing enemy mechanics that can abruptly reverse fortunes. Players are forced to weigh aggressive upgrades against a looming possibility of a cascading misstep. Even the most finely tuned strategies can be derailed by a combination of the enemy’s inherent abilities and unforeseen in-game events. Such tension transforms each round into a high-stakes balancing act, where the thrill of potential victory is matched by the ever-present specter of defeat.
Artistry in Aesthetics and Humor
The game’s aesthetic and narrative themes are presented in a distinctive manner embraces a distinctive blend of irreverence and detail. Echoing the legacy of its creative predecessor, the game incorporates a wry, self-aware commentary through its visuals and hidden nods to earlier works. Environments are punctuated with a blend of grim urban decay and bizarre, cartoonish accents that reinforce the unique world view. Humor, subtly interlaced with the game’s challenges, provides a welcome respite from the tense tactical encounters. This aesthetic approach not only highlights the game’s creative roots but also shapes the player's emotional journey, where laughter and anxiety frequently coexist. Every brushstroke of design plays "a pivotal factor in drawing the player into" a landscape that is as humorously macabre as it is strategically demanding.
Complex Build Interactions and Skill Synergy
One of the game’s most compelling aspects is the dizzying array of build combinations available to the player. The system allows for nearly infinite permutations of skills, items, and class-specific abilities that can be mixed to form unconventional strategies. Whether focusing on augmenting damage output, enhancing mobility, or creating defensive fortifications, every choice influences the flow of combat. This complexity demands that players not only understand the innate strengths of each character but also explore how various synergies can be exploited to optimize performance. By offering a robust set of variables, the game ensures that even repeated plays introduce new tactical puzzles, encouraging experimentation with rare combinations and the discovery of unique, game-changing interactions that can turn the tide during fierce encounters.
Calculated Risk and the Nature of Randomness
The game's fundamental unpredictability is both a boon and a bane, where fortune can either catapult you to spectacular successes or abruptly truncate a promising run. Every encounter is underscored by the knowledge that an unexpected twist can upend carefully laid plans. This tension fuels a gameplay loop that relentlessly tests the player’s risk management skills and capacity for resilience. At times, the unpredictability manifests in seemingly trivial events—such as a temporary disadvantage that hampers a unit’s mobility—yet these moments can have significant consequences when compounded over a round. The constant juxtaposition of strategy against chance keeps each battle alive with suspense, driving home the point that in this realm, mastery involves not only preparedness but also an acceptance of the whims of fate.
Expansive Replayability and Depth of Strategy
The game’s design encourages an enduring commitment from its players, offering layers of depth that reveal themselves over prolonged engagement. With nearly 50 hours of content and a myriad of evolving strategies, every run feels like an invitation to explore new facets of gameplay. Each expedition into combat not only tests your immediate tactical acumen but also functions as a fundamental component in a broader narrative of progression across generations of feline heroes. As players become more familiar with the enemy patterns and inherent challenges of the arenas, they are also rewarded with opportunities to refine and redefine their approach. This evolving loop of learning and adapting ensures that the game's strategic richness keeps pace with its unpredictable and vibrant world, offering continuous intrigue without resorting to static or formulaic gameplay.
Feline Fury: Navigating Chaos in a Tactically Unpredictable... The game unfolds as an unpredictable and boldly imaginative fusion that celebrates both strategic mastery and quirky design. In a world where felines wield impressive combat skills, players are drawn into a universe where every decision resonates with risk, opportunity, and rapid tactical evolution. The experience challenges traditional norms in turn-based arenas, requiring players to think several steps ahead while juggling the whims of fate and randomness alike. Inspired by celebrated predecessors yet distinct in its own irreverent spirit, the game invites enthusiasts to experiment with diverse playstyles, discover hidden interactions, and embrace chaos in the pursuit of victory.
The Versatile Archer Archetype Reimagined
The game introduces a remarkably adaptable combat specialist reminiscent of the classic archer but expanded into something far more intricate. This agile fighter, commonly known as the Ranger, can transform into a precision assassin with enhanced ranged damage and critical strikes that neutralize foes from afar. Alternatively, the character morphs into a rapid-fire specialist, unleashing multiple attacks in one turn to suppress enemy clusters. With a capacity to deploy traps that regulate the enemy’s movements and summon auxiliary entities for crowd control, this archetype embodies the strategic fluidity that defines the game. Every encounter with the Ranger forces players to evaluate risk and reward dynamically, challenging them to balance offensive upgrades with the need for tactical reactivity.
Intricate Combat Arenas and Tactical Engagements
Set in claustrophobic, arena-based battlefields, the game's design echoes the tight, turn-based combat of classic strategy titles. Each encounter is staged on environments that range from grimy urban alleys adorned with scattered debris to unconventional territories where the enemy might be as unexpected as a wandering stray. The emphasis on spatial positioning and movement nuance transforms each skirmish into a mini chess match. Players must rapidly adapt their formation as unpredictable adversaries move through the arena. Every decision counts; even a momentary lapse in positioning can expose valuable units to overwhelming counterattacks. In these settings, the balance of aggression and defense is paramount, and every turn serves as a test of both quick strategy and measured execution.
Dynamic Partnerships and High-Stakes Synergy
Central to the game’s layered complexity is the interplay between specialized characters and their evolving synergies. One memorable combination involves pairing an upgraded Ranger with a supportive Cleric whose abilities extend beyond simple healing. In this interaction, the Cleric designates a key figure whose power is amplified dramatically. On a critical turn during a major confrontation, this synergy can induce monumental effects on enemy health bars, shifting the balance of power in a heartbeat. However, such powerful combinations come with intricate risks, as certain enemy behaviors may trigger devastating counter-effects if not managed carefully. This dance of coordinated timing and upgraded abilities adds a rich layer of tactical suspense and Compels players to routinely rethink their tactics.
Roguelike Ethos and Ever-Changing Felines
The game firmly embraces the roguelike tradition of unpredictability, ensuring that no two runs are identical. Here, feline protagonists become both the heroes and the casualties of exploration. Once a cat completes its expedition, it is retired from active combat, passing its legacy to subsequent generations. This constant turnover requires players to continually invest in new roles, gear, and tactical experiments. Each new team Here's an alternative phrasing that maintains the original context:
"has been completely developed from scratch, and the" evolving skill sets of your feline units are both a blessing and a challenge. Randomized enemy encounters and unpredictable arena events create layers of complexity that demand dynamic planning. This commitment to impermanence ensures that every foray is a fresh puzzle, where both fortunes and failures sculpt the narrative of your ongoing campaign.
Unpredictable Encounters and Strategic Variance
Random events and unforeseen enemy maneuvers are "Intricately intertwined with the very core of the game.", ensuring that the path to victory is constantly shifting. Not every scenario unfolds as anticipated; a positive event in one moment can cascade into complications the next. Felines may temporarily acquire adverse traits that interfere with their usual routines, causing them to retreat in disarray just when coordinated strikes are crucial. These moments of chaos force players to recalibrate their plans on the fly, emphasizing the importance of adaptability over rigid, pre-conceived strategies. As players learn to navigate this spectrum of unpredictability, the game rewards resourcefulness and creative problem-solving, making every successful round feel like a hard-fought triumph born of persistence.
Innovative Breeding and Lineage Development
The breeding system ventures beyond straightforward progression, offering a unique twist to character development. Success in the game depends not only on immediate combat prowess but also on nurturing a lineage of capable feline warriors. Retired warriors, when provided with a comfortable base and proper resources, give rise to offspring imbued with improved attributes. However, the process is far from simple, as the genetic outcomes can vary unpredictably. Players may spend several turns attempting to combine the traits of specific classes, only to face unexpected behavioral quirks or mismatched characteristics in their progeny. This delicate balancing act between ambition and the natural randomness of breeding adds another layer of strategy, ensuring that long-term planning is as critical as the immediate tactical decisions on the field.
Ruthless Encounter Design and Tactical Sacrifice
While the game is deeply strategic, its encounter design does not shy away from putting players in impossible scenarios. The thematic approach does not lean on tidy, sugar-coated difficulties; instead, it revels in tightly wound battles where every move is fraught with existential risk. Boss encounters, in particular, are designed to challenge highly optimized builds by introducing enemy mechanics that can abruptly reverse fortunes. Players are forced to weigh aggressive upgrades against a looming possibility of a cascading misstep. Even the most finely tuned strategies can be derailed by a combination of the enemy’s inherent abilities and unforeseen in-game events. Such tension transforms each round into a high-stakes balancing act, where the thrill of potential victory is matched by the ever-present specter of defeat.
Artistry in Aesthetics and Humor
The game’s aesthetic and narrative themes are presented in a distinctive manner embraces a distinctive blend of irreverence and detail. Echoing the legacy of its creative predecessor, the game incorporates a wry, self-aware commentary through its visuals and hidden nods to earlier works. Environments are punctuated with a blend of grim urban decay and bizarre, cartoonish accents that reinforce the unique world view. Humor, subtly interlaced with the game’s challenges, provides a welcome respite from the tense tactical encounters. This aesthetic approach not only highlights the game’s creative roots but also shapes the player's emotional journey, where laughter and anxiety frequently coexist. Every brushstroke of design plays "a pivotal factor in drawing the player into" a landscape that is as humorously macabre as it is strategically demanding.
Complex Build Interactions and Skill Synergy
One of the game’s most compelling aspects is the dizzying array of build combinations available to the player. The system allows for nearly infinite permutations of skills, items, and class-specific abilities that can be mixed to form unconventional strategies. Whether focusing on augmenting damage output, enhancing mobility, or creating defensive fortifications, every choice influences the flow of combat. This complexity demands that players not only understand the innate strengths of each character but also explore how various synergies can be exploited to optimize performance. By offering a robust set of variables, the game ensures that even repeated plays introduce new tactical puzzles, encouraging experimentation with rare combinations and the discovery of unique, game-changing interactions that can turn the tide during fierce encounters.
Calculated Risk and the Nature of Randomness
The game's fundamental unpredictability is both a boon and a bane, where fortune can either catapult you to spectacular successes or abruptly truncate a promising run. Every encounter is underscored by the knowledge that an unexpected twist can upend carefully laid plans. This tension fuels a gameplay loop that relentlessly tests the player’s risk management skills and capacity for resilience. At times, the unpredictability manifests in seemingly trivial events—such as a temporary disadvantage that hampers a unit’s mobility—yet these moments can have significant consequences when compounded over a round. The constant juxtaposition of strategy against chance keeps each battle alive with suspense, driving home the point that in this realm, mastery involves not only preparedness but also an acceptance of the whims of fate.
Expansive Replayability and Depth of Strategy
The game’s design encourages an enduring commitment from its players, offering layers of depth that reveal themselves over prolonged engagement. With nearly 50 hours of content and a myriad of evolving strategies, every run feels like an invitation to explore new facets of gameplay. Each expedition into combat not only tests your immediate tactical acumen but also functions as a fundamental component in a broader narrative of progression across generations of feline heroes. As players become more familiar with the enemy patterns and inherent challenges of the arenas, they are also rewarded with opportunities to refine and redefine their approach. This evolving loop of learning and adapting ensures that the game's strategic richness keeps pace with its unpredictable and vibrant world, offering continuous intrigue without resorting to static or formulaic gameplay.
- Landon White
- 2026-02-09